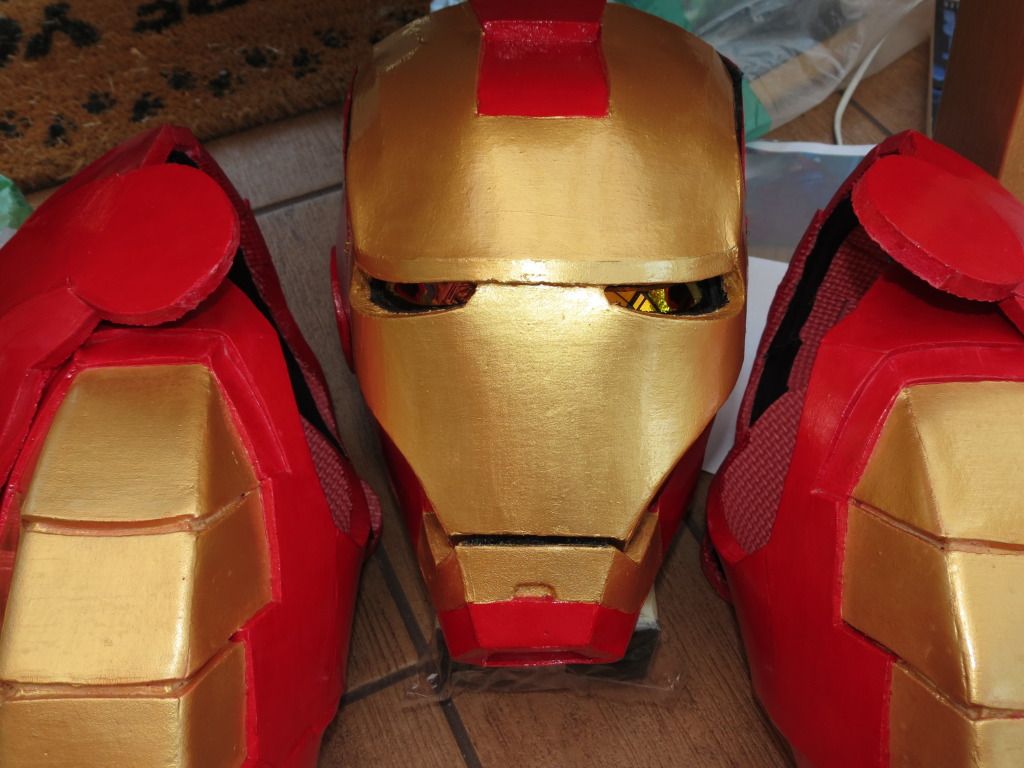
In my last post, I gave a quick overview of how I built my 2012 Iron Man costume.. but it grew rather long, and I decided to leave a few bits to have their own post.. After all, much of the last post wouldn't be particularly new material to anyone who follows the RPF threads on foam armor builds.. but maybe some of this post may be useful..
Read on for more info on tasty costumey details =)
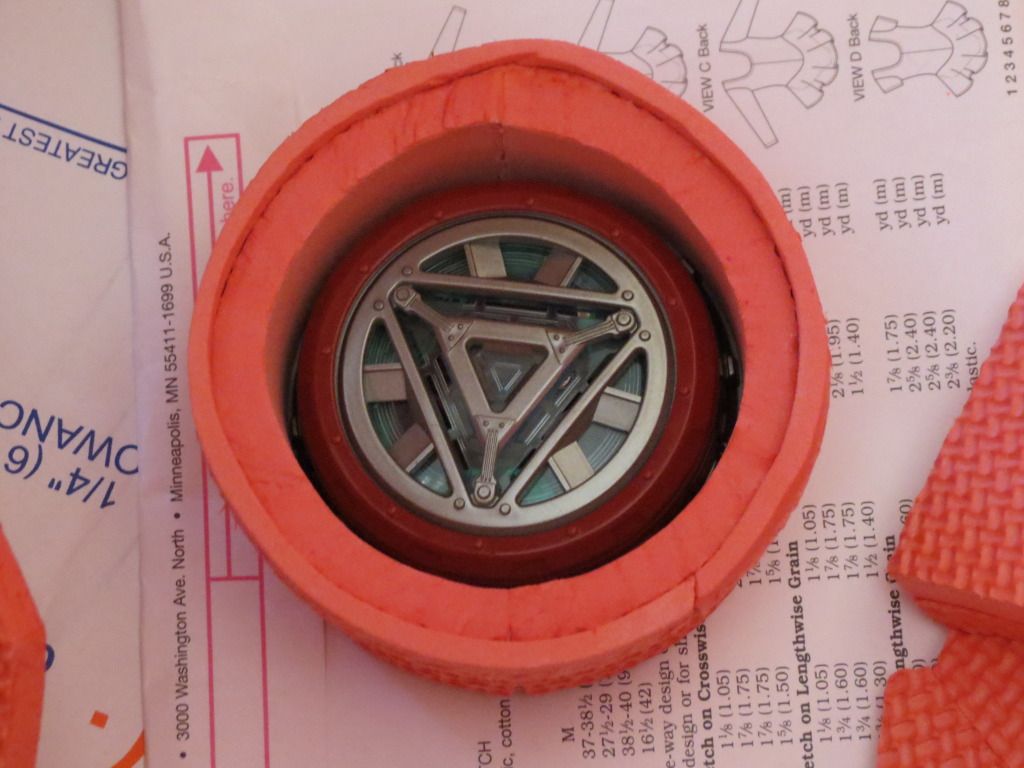
Modded Arc Reactor.
I really liked the little prop replica one, but its price made it pretty unlikely I could justify it... I saw one of the toy ones go on ebay pre 'modded' to have brighter leds.. and figured I'd find myself the cheapest one I could & mod it myself.
 |
| Arc reactor mount |
Eventually one came round on ebay within my price bracket, and I picked it up.. the color match to the suit was good enough, but the default unit just sucks.. 3 very dim yellow leds.. Yellow!! since when did the arc reactor give off anything other than a blue-white glow??
 |
| Arc reactor offline. |
So I dug out some nice super bright white/blue leds, and did a little measuring, 2.4v at the led board, nowhere near enough to light 3.5v white leds.. and generating another whole volt thru a boost circuit just sounded like a little too much effort..
Then I noticed the little round cupboard light we .. had ..
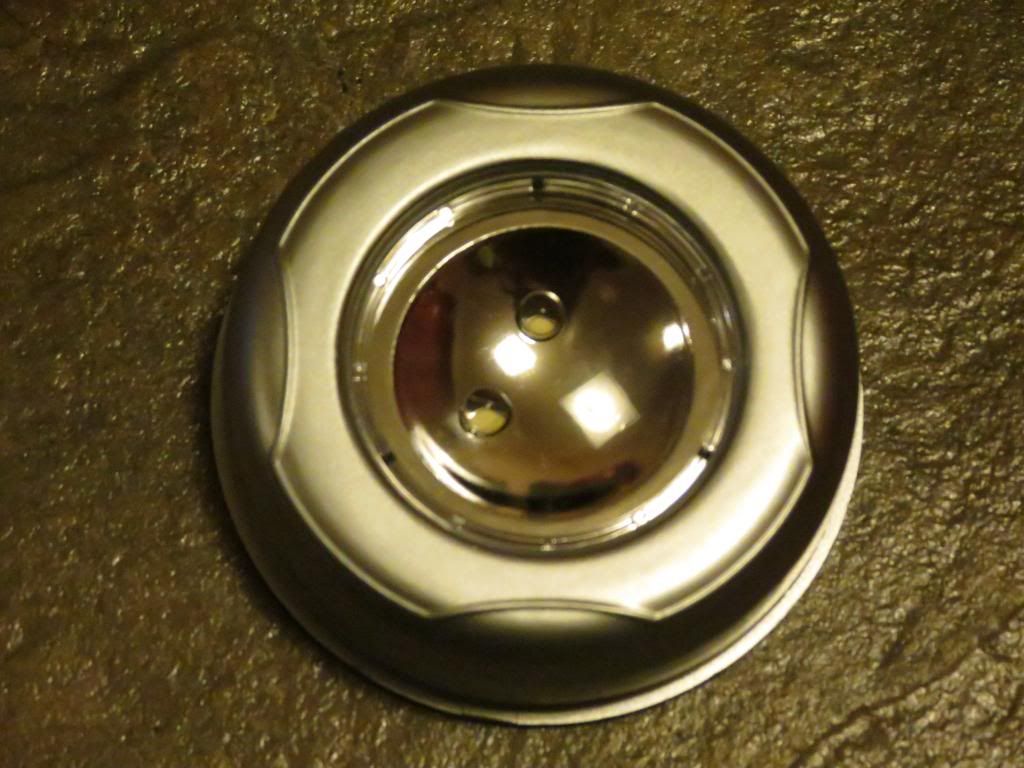 |
| Cheap 3-LED cupboard light |
Its diameter turned out to be identical to the toy reactor.. insanely identical.. but not well enough aligned for the screw posts to match up.. 1 quick session with the hot knife later, and that was fixed, one session after with the hot glue gun, and the half dome reflector was fixed to the inside of the transparent arc reactor section.. a bit more hacking with the soldering iron, and I'd given it a flying on/off switch I could add to the suit somewhere reachable =)
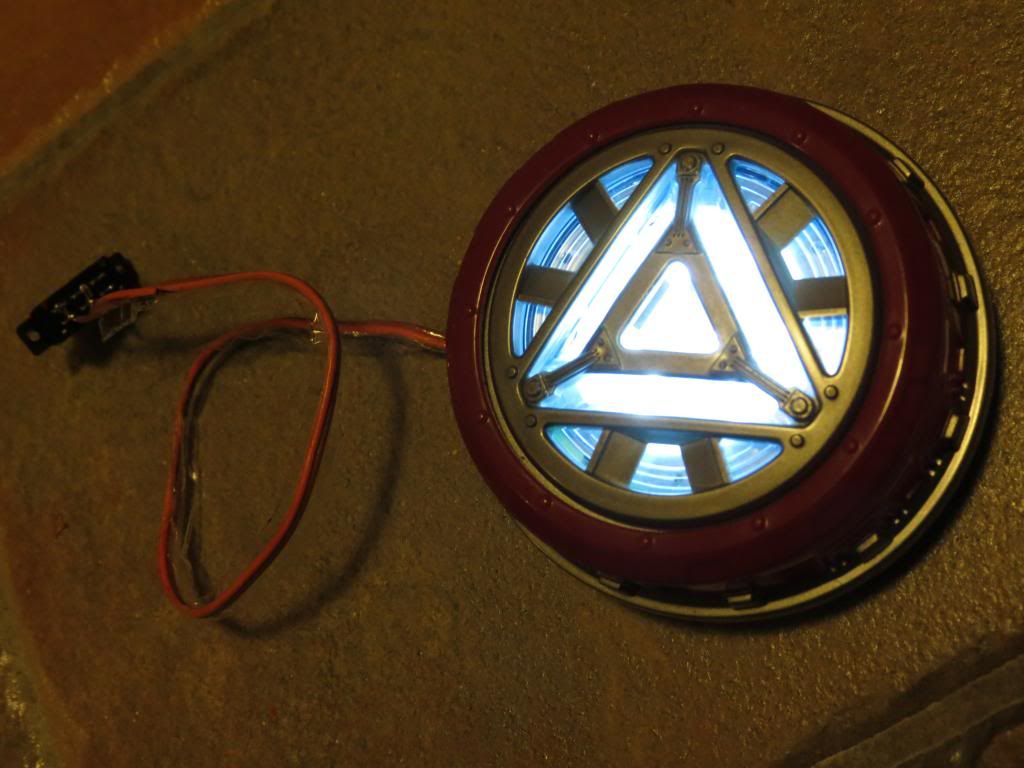 |
| Cupboard light + Arc Reactor + Switch.. |
Sadly all this modding kinda broke all the retention clips for the led light back part.. so now all the batteries fell out when it was moved.. great.. I remember the middle had no important electronics, so drill thru & fit a pc fan self tapping retention screw.. simples =)
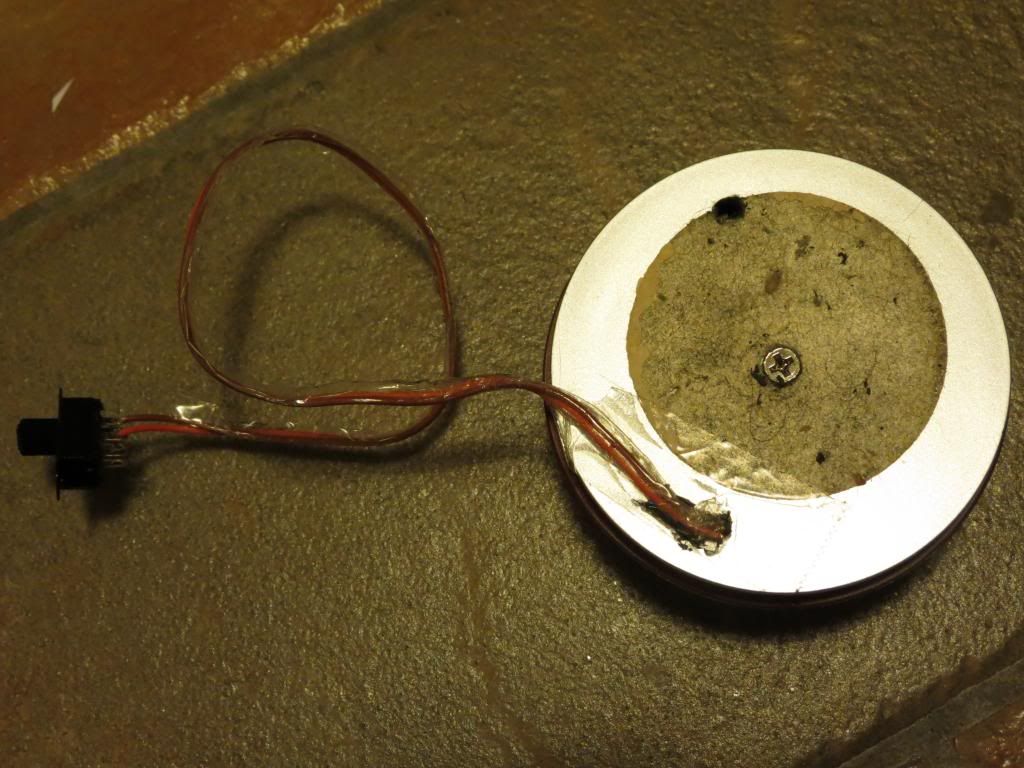 |
| Screwed. |
Mirrored Lenses in the Helmet.
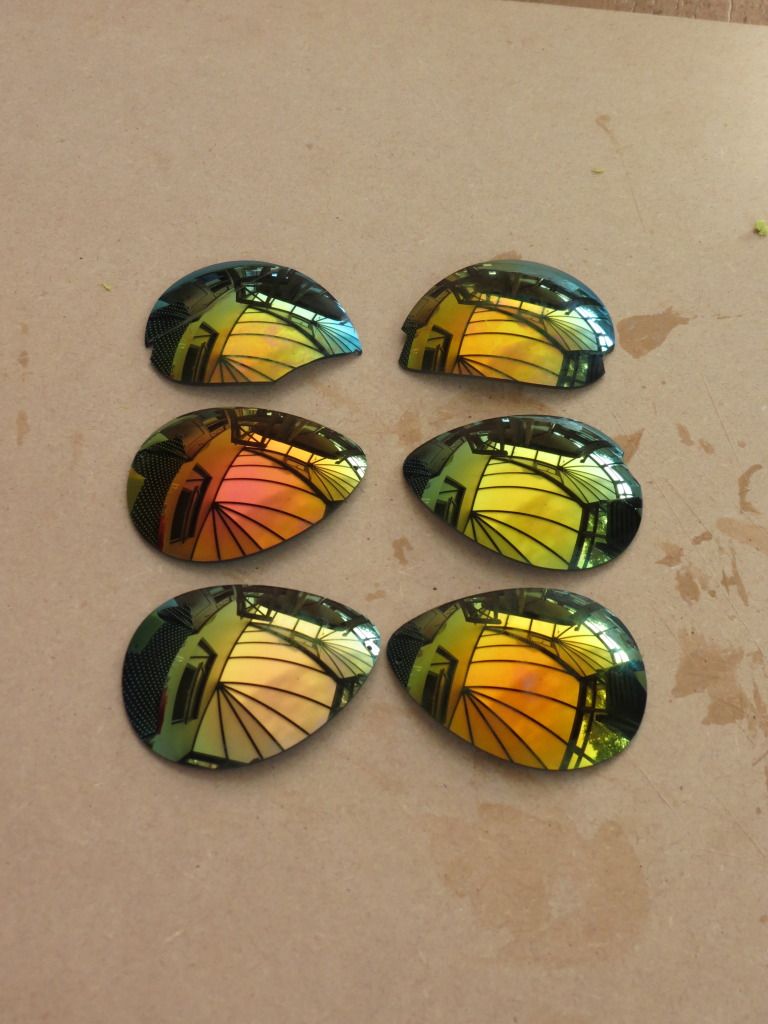 |
| Lenses. |
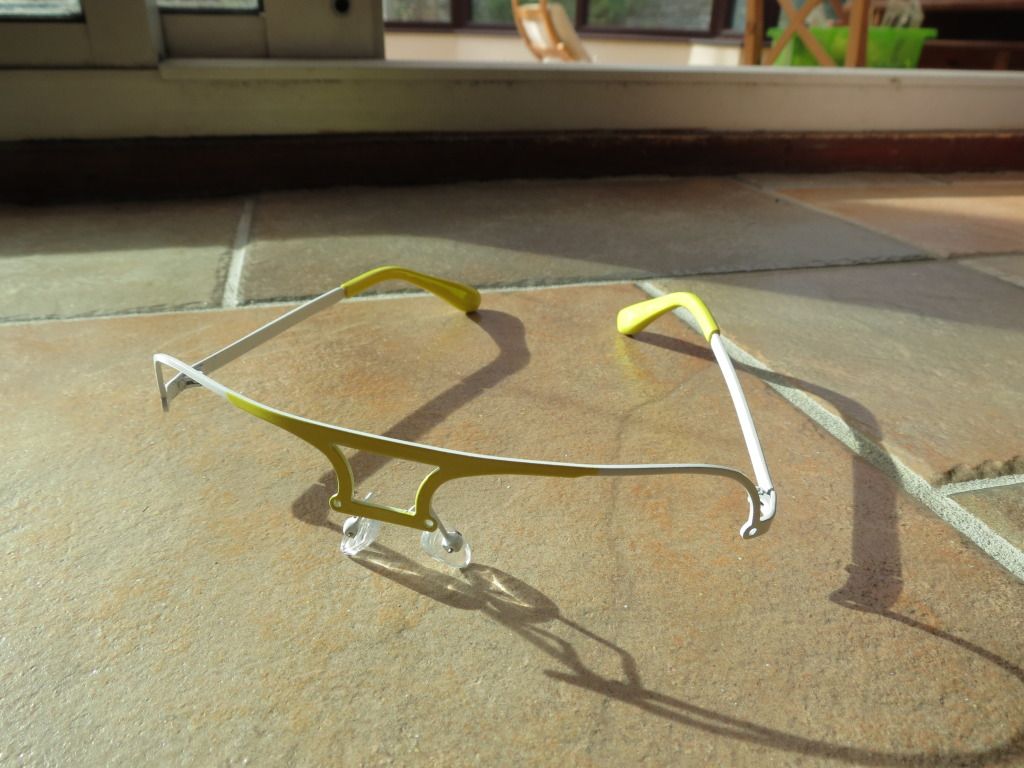 |
| Frames. |
They started life as yellow/gold tinted aviator glasses, from Primark, given it was now October, Primark were quite keen to get rid of their summer sunglasses range. Primark are also not exactly known for their high prices, so I got 3 pairs of them for just 50 pence each =)
Ruined the 1st pair by attempting to pop the lenses off the wire frame. One snapped clean through, the next pair I noticed the tiny screws holding the lenses on.. undid those & got 2 nice sets of lenses to use..
So then I just had to mount them in the foam helmet. I tried my usual approach, add a little superglue round the inside & push the lens in till it made contact.. result? disaster, the glue dribbled across the visible surface of the lens, ruining the effect.. I tried again, being more careful, still disaster.
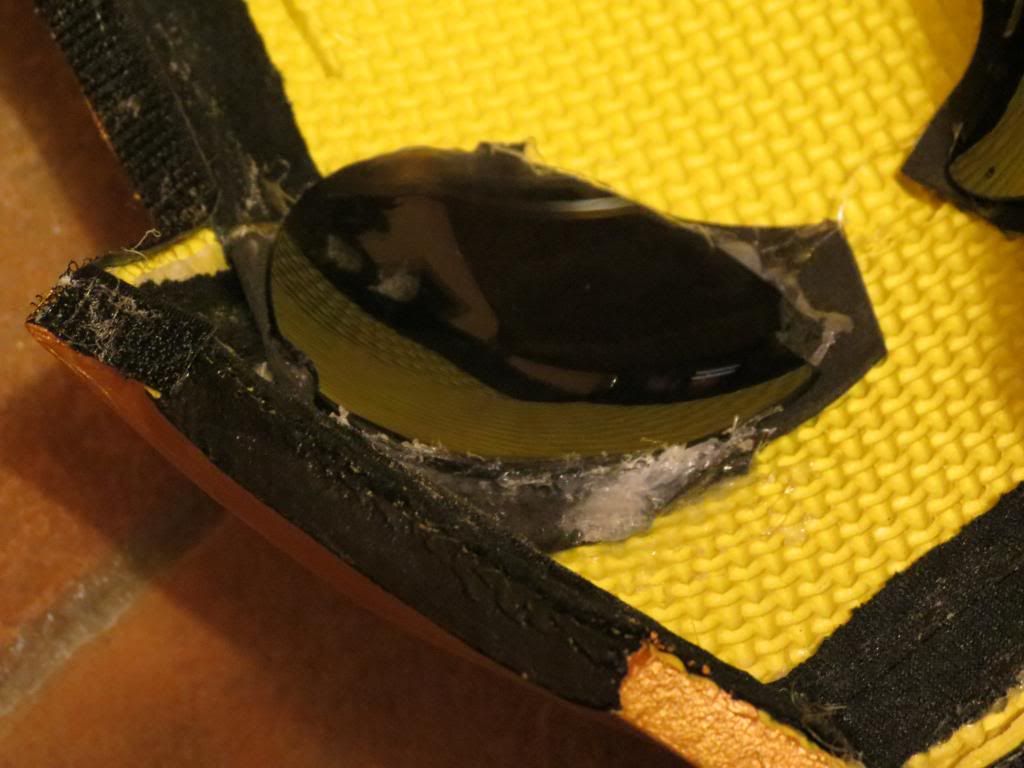 |
| Lots of Glue. |
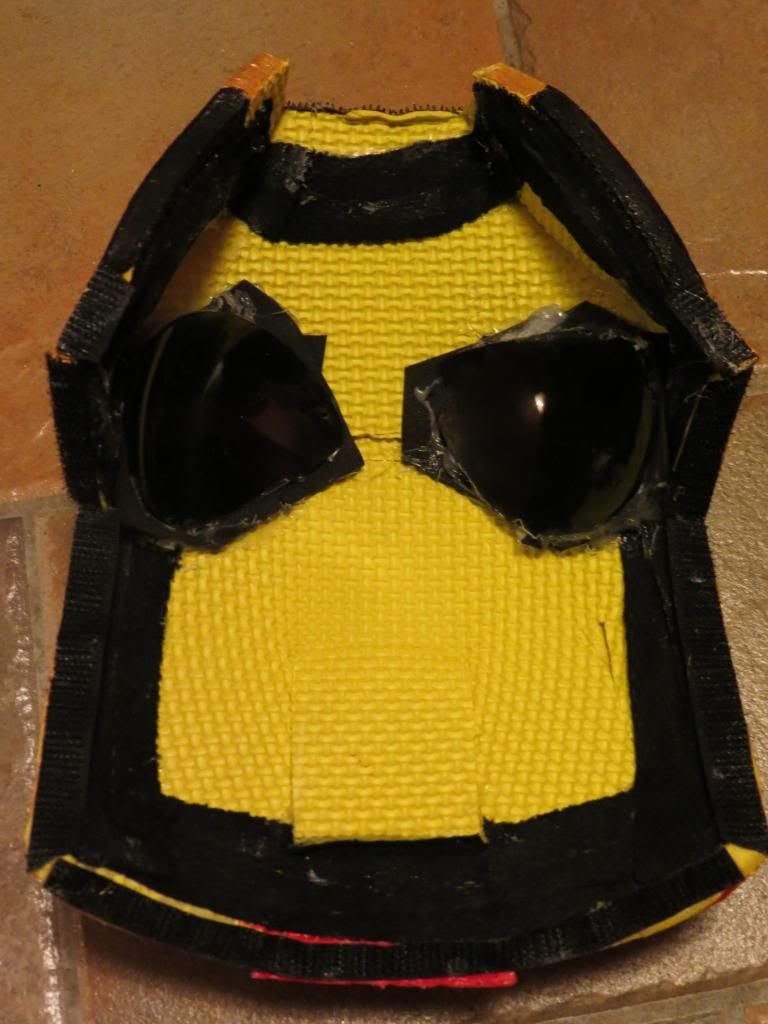
Then I tried a suggestion elsewhere, use thin 1-2mm foam, and the hot glue gun to glue a frame/mount onto the front of the lens.
Then glue the frame/mount to the mask.. that almost worked, but the curves were wrong, so it popped off.. eventually fixed it by building up the curves inside the mask with more thin foam, till the lens could mount pretty cleanly.
This eventually gave the lenses about a 1cm recess, which ended up looking pretty cool, so overall I was happy =)
 |
| Lenses mounted. |
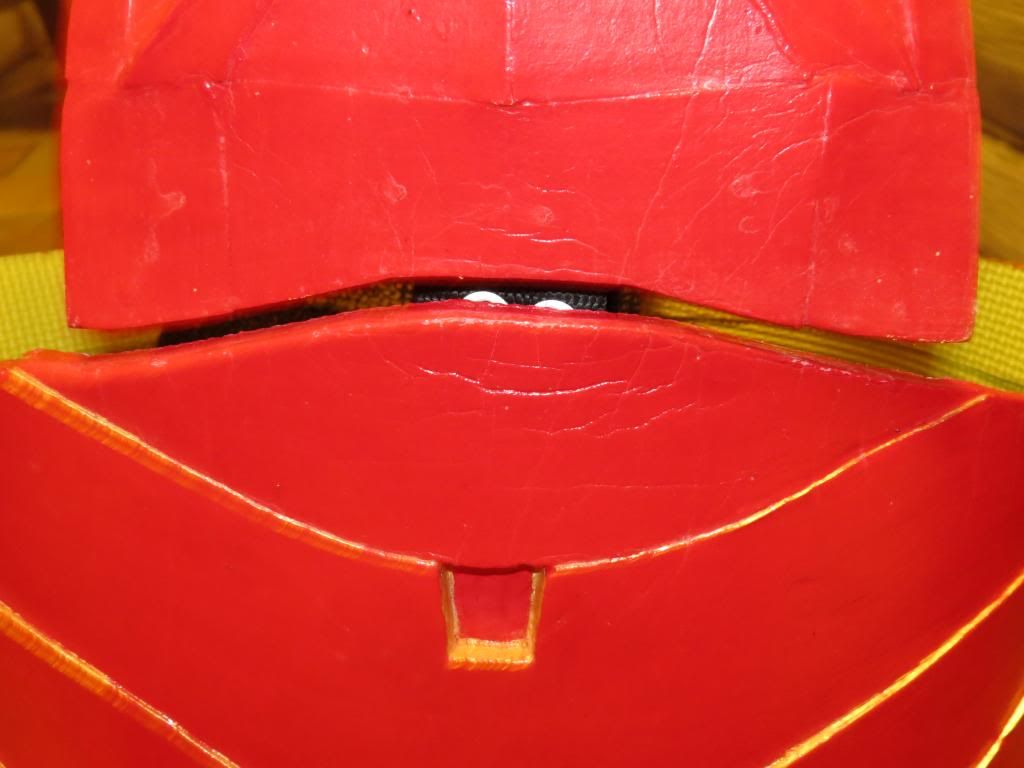
Shaping Wires for Shoulder & Facemask.
So this next part would never be needed on a fibreglass/resin build.. but my foam build kept trying to drift shape.. the shoulders would attempt to open up during painting/priming.. so during that I glued a few retention struts on the inside, they held nicely, but obviously I needed a better solution.
In the end I used some garden wire (think coathanger wire, but without the need to murder coathangers!).. and carefully curled it to ensure any sharp edges would go into the foam, but never enough to come back out.. and then used around an inch wide strip of cloth over the wire to hold it in place along the curve of the shoulder piece.
 |
| Shoulder shaping wire glued in place. |
 |
| Helmet showing shaping wire glued in place. |
 |
| Inside of mask with shaping wire glued in place. |
Articulation for the Arm Joints.
In his awesome youtube video, stealth recommended using chicago screws.. hunting around the UK DIY outlets gave some cabinet screws for kitchens, in a 20 pack for a cheap price, but they were 1 inch long.. and my foam is only about 8mm deep..
 |
| Articulated, with spacers. |
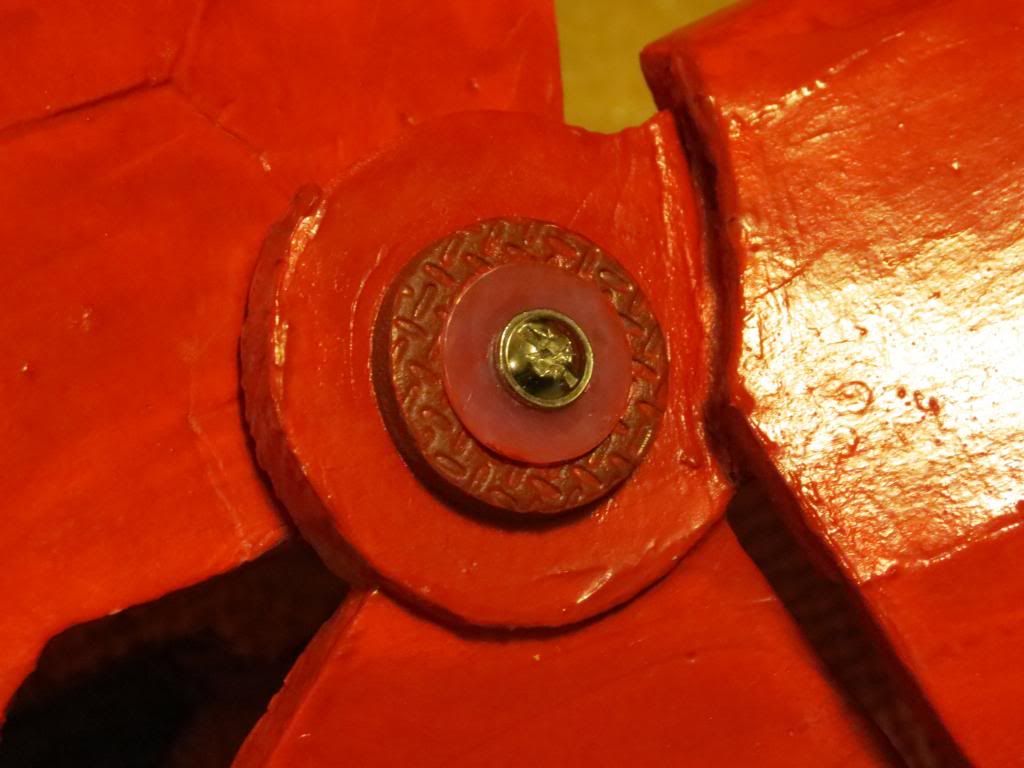 |
| Washer reinforced. |
So I picked up some nylon penny washers off ebay, and found some self adhesive foam cushion feet.. and mounted them using the cushions as spacer/washers.
Carefully glueing them to the arms, and then scoring and glueing the nylon penny washers to the cushion feet to spread the load & help prevent the screw ever tearing through the foam.
After I'd done all that, I read about doll fastenings, which sounds like a better way to go, and likely easily adjustable for depth..
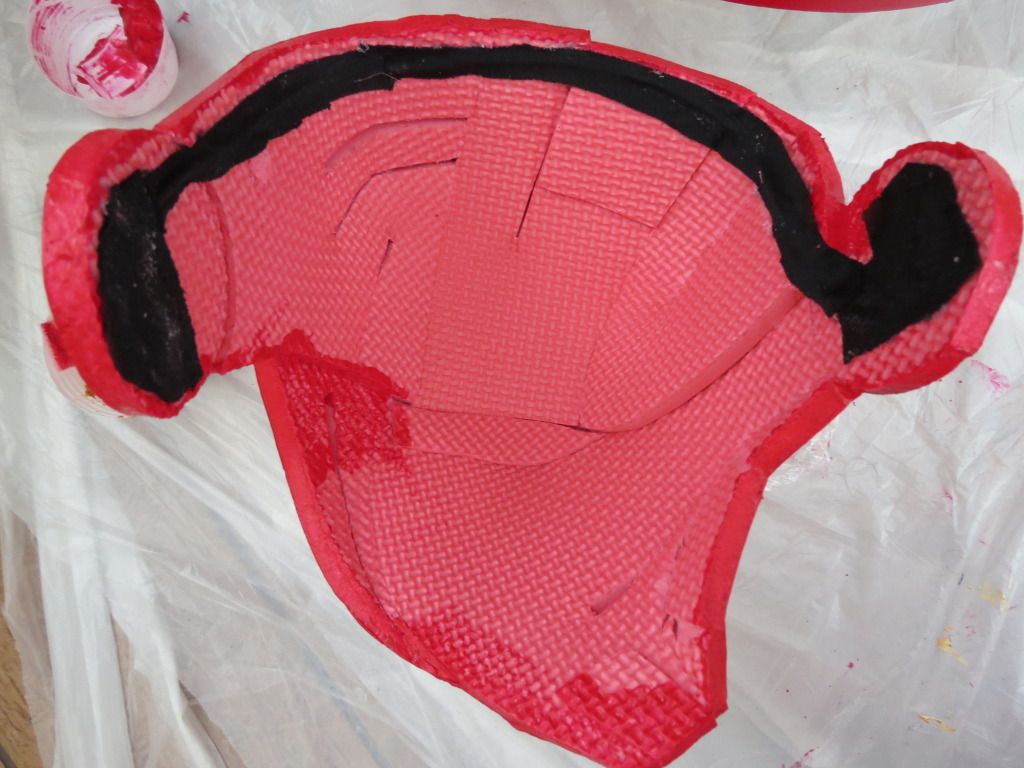
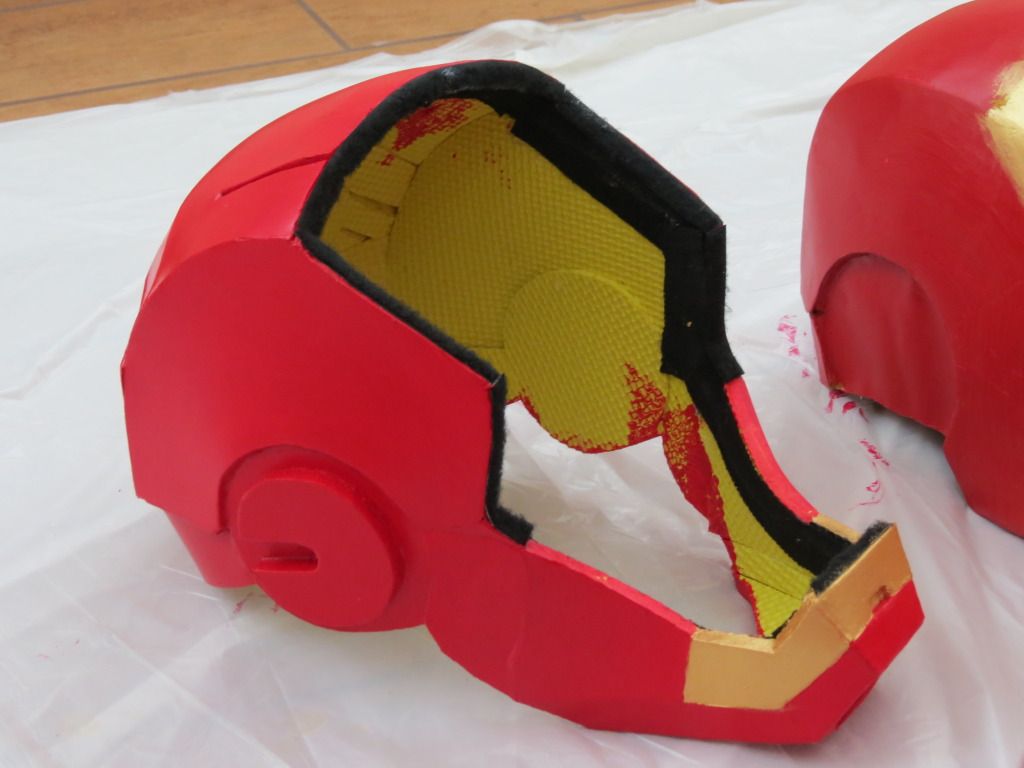
Lining/edging for Helmet & Chest Section.
When the faceplate is removed, you could see nice yellow foam around my head, this was bad.. Iron Man does not wear Yellow Hats ;p
So I decided to line the helmet with cloth.. using the hot glue gun to attach the fabric to the inside.. cutting and trimming as I went.. the end result looked good.. but it ATE glue .. Originally I planned to use the same technique for the entire inside of the chest, until I realised I'd need shares in a hot glue company.
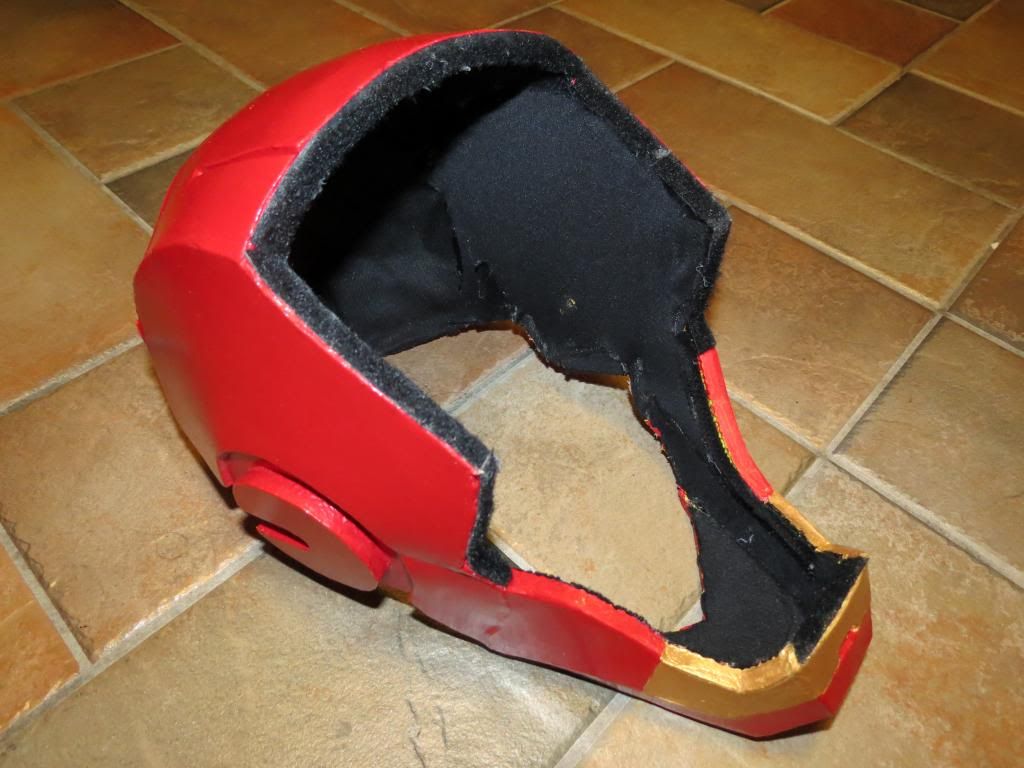 |
| Cloth lined. |
So the interior of the chest, I had to find a new plan.. I tried paint on the inside of the brace, but as I hadn't primed it, and didn't really want to.. the finish was .. less than ideal ;p So I looked at the price of permanent black markers, and hey, the local supermarket sold 2 of them for 50p =) .. I bought 4 ;p I should have bought 6 ;p .. I spent the next evening just coloring in the foam.. the result is dark enough that it doesn't look pink/yellow when worn.
 |
| Blacked out. |
Then I noticed that where the chest overlaps the waist/abs, it was denting the finish, and would only be a matter of time until it started to peel the paint. A quick check revealed the base of the chest piece had quite sharp edges, where the layers of pva had built up on the bottom, and layers of paint, and layers of clearcoat polish... they'd all added up to edges I ddint want to cut off, for fear of exposing the foam core.. so I found some spare velour like cloth, made an inch wide tube or so, and glued that around the edge.. so now the chest piece glides over the abs, resting on a cushion of velvety fabric!
 |
| Velvet Edge. |
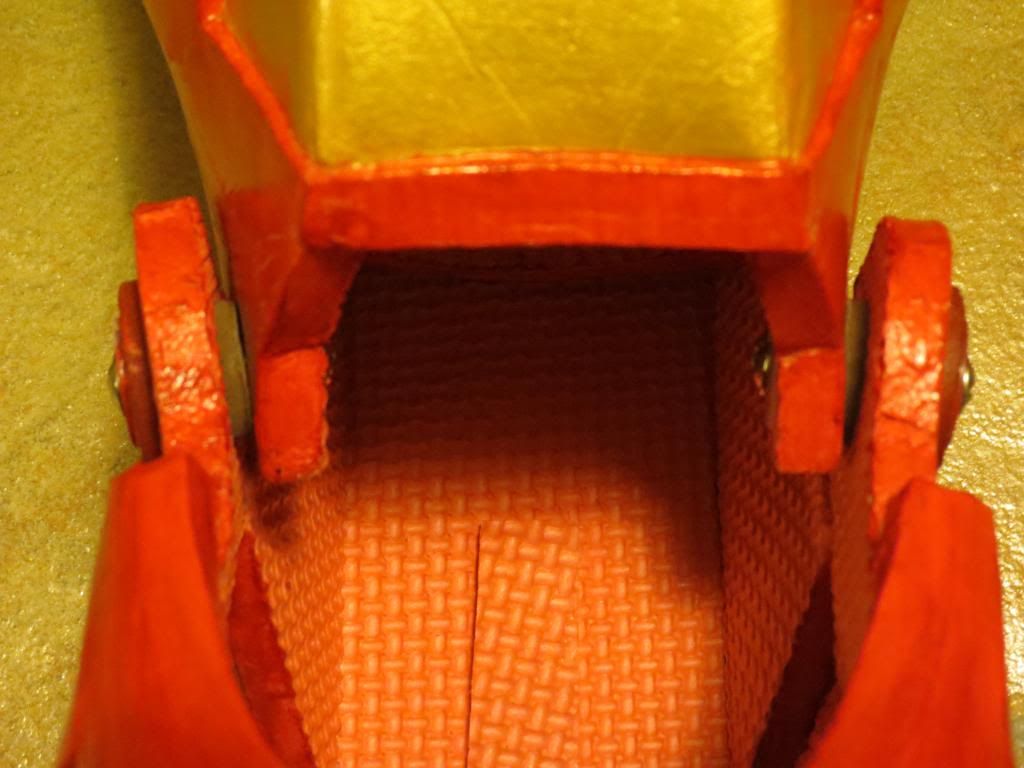
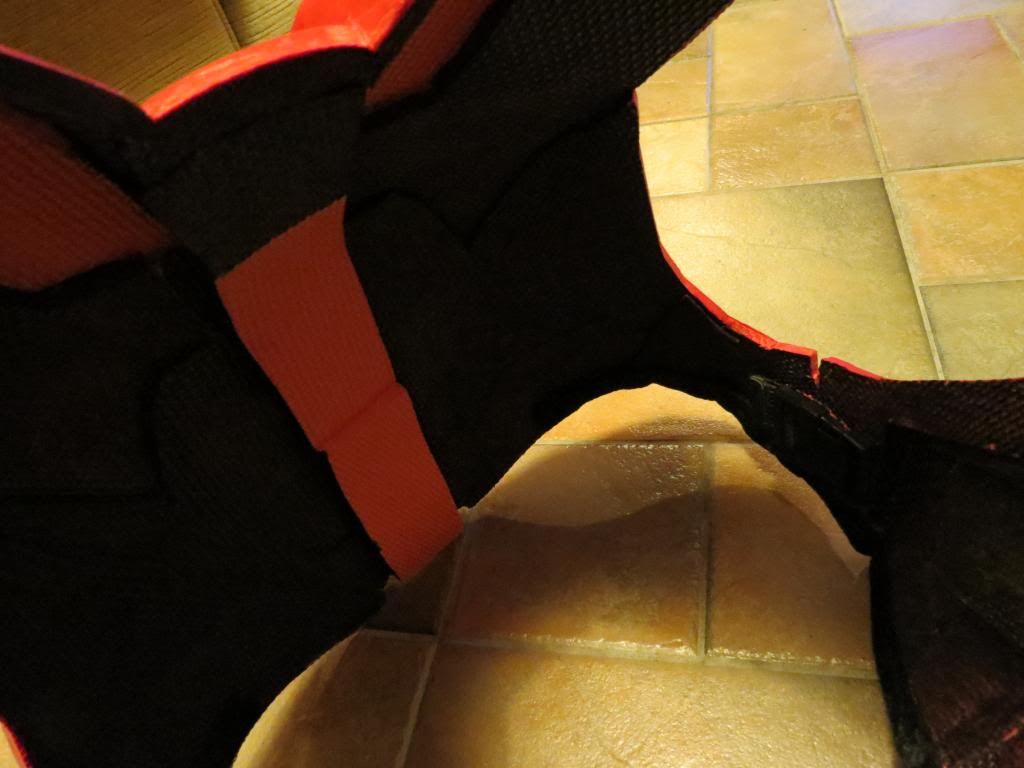
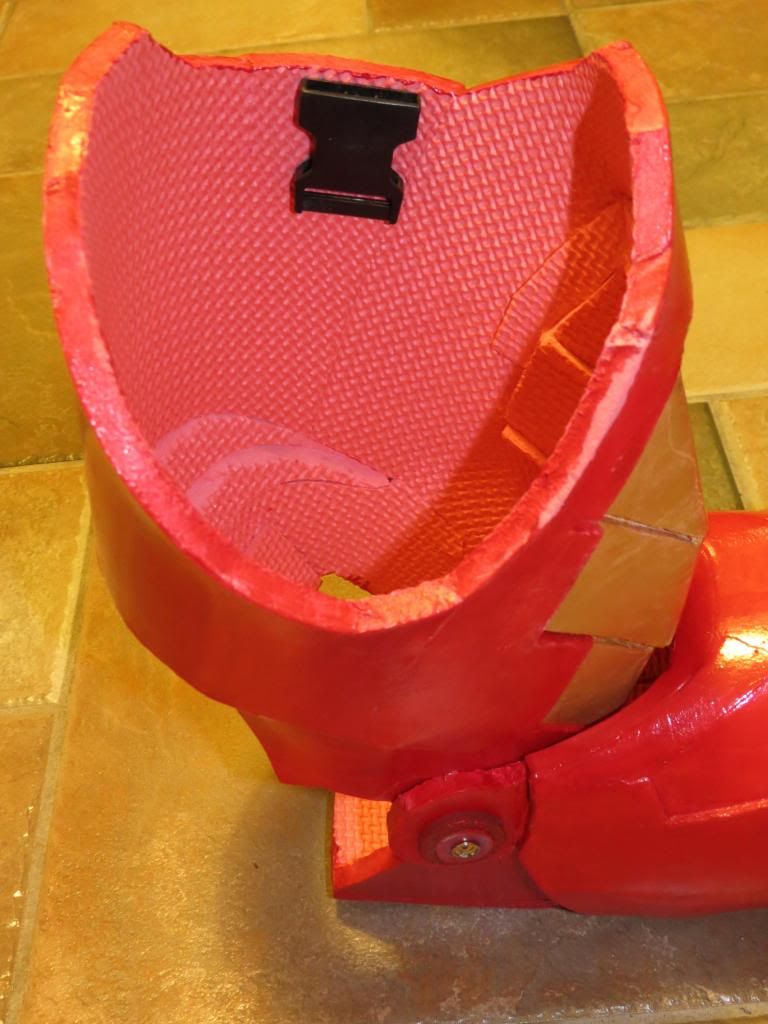
Buckles/Fastenings for the Arms & Shoulders.
Again drawing from Stealths video.. I rummaged around in the loft, and found some old rucksacks with clippy buckles, hacked them off, kept some of the webbing, and set about gluing it all together..
Using a craft knife I carefully scored a deep crosshatch pattern into one side of the buckle housing.. coated it in superglue, and pressed it carefully into the foam.. counted to 60, and bingo.. that's not coming off in a hurry..
I've put one huge buckle (from a suitcase) on the inside of the chest here..
 |
| Huge Buckle, about 2" tall. |
And one under each shoulder lip.. intentionally so it can be worn without the arms if needed without needing to tuck webbing out the way..
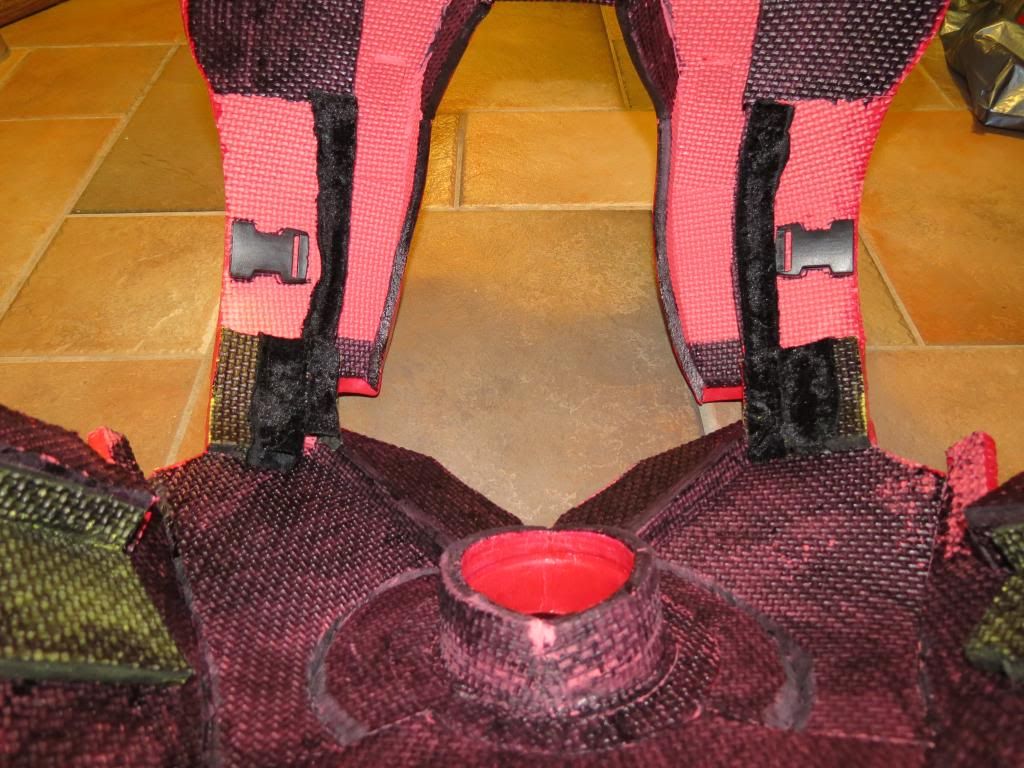 |
| Shoulder buckles, and some more velvet. |
And the last on the inside of the outside edge of the upper arm.
 |
| Buckle socket glued inside upper arm. |
Finally attached the webbing, with the buckles inside the shoulder, like this.. I found where to put them by lining it all up, holding the webbing in place, then marking it out & glueing it.. there is 'some' adjustment possible, how far up the chest overhang the shoulders sit, and how hard the shoulders work to hold the upper arms up.. (though the wrist cuff sections are a pretty good fit, and the whole arm, once on, doesn't move too easily).
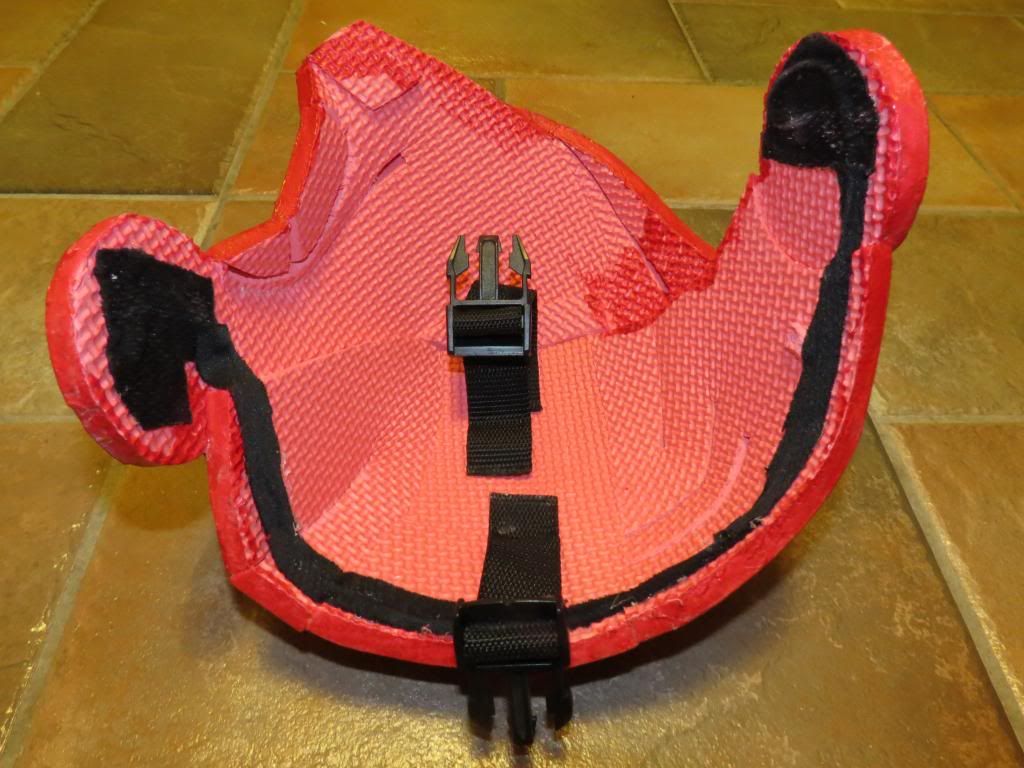 |
| Clips & Webbing. |
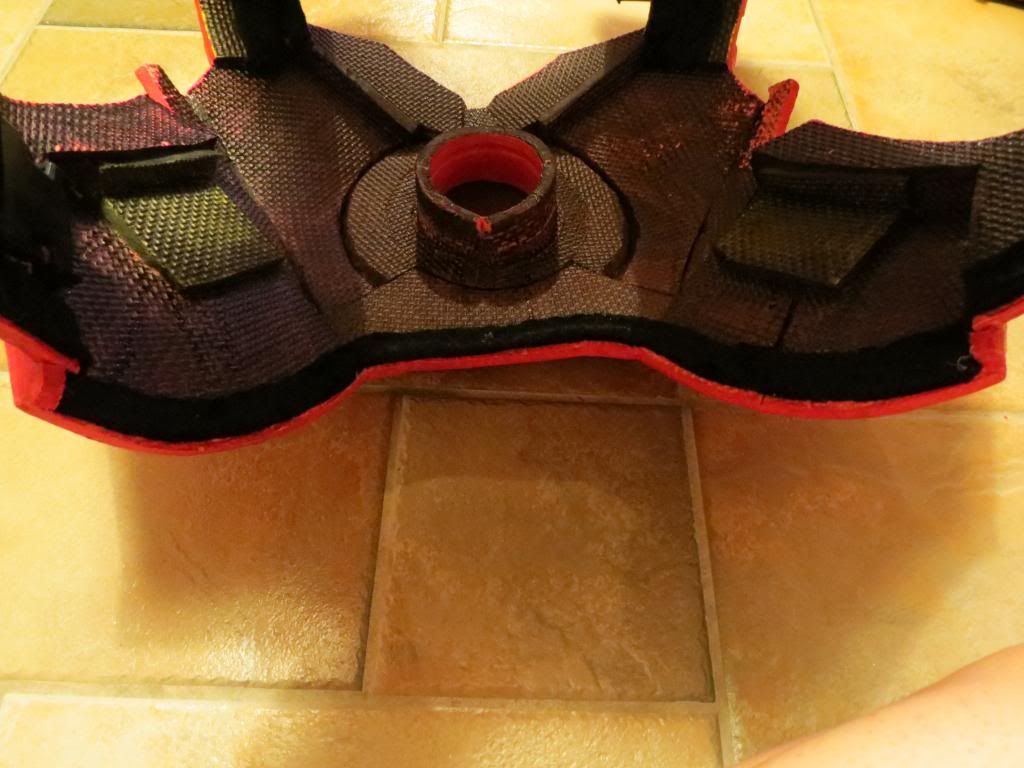
Lastly, and more as an afterthought, I used some spare webbing to link the abs section, to the base of the brace. Because the arc reactor cylinder runs through the brace, the brace cannot move up/down independently of the chest section. So by attaching the abs to the brace, I can totally prevent the abs dropping low enough that it could 'escape' from under the front of the chest.
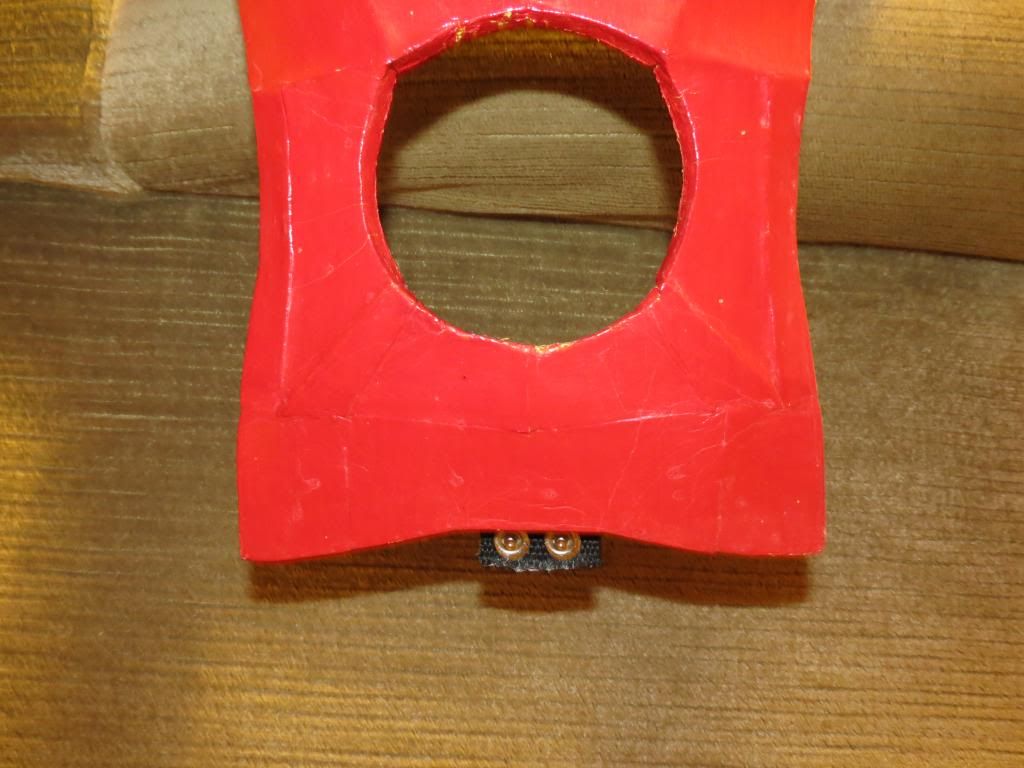 |
| Brace with abs connector. |
 |
| Abs connected to brace. |
No comments:
Post a Comment